
Use Azure KeyVaults in BC OnPrem
Over the last few days, I’ve been doing a bit of research on Azure KeyVaults in BC. Actually. we want to setup our Extensions to retrieve API keys, passwords etc. from the latter. This has the advantage that we no longer have to hide the secrets somewhere in the code, but in a central location…. and above all they stay editable. However, the initial setup is not trivial. Yes, there are some tutorials on the web, both from Microsoft and some MVPs. But for me, it only got clear when I struggled through it myself.
This step-by-step guide is about setting up and using Azure KeyVaults with Business Central OnPrem (both classic and Docker installations). I wrote it as setting this up for OnPrem is a little bit trickier than for AppSource extensions. For use in AppSource, the documentation in the MSDN is quite sufficient as Microsoft manually activates your AppIDs to access your KeyVault. So, there’s less configuration but more communication.
Create your Azure KeyVault
Our first mission is to create the Azure KeyVault itself. So, login to your Azure Portal and navigate to “Key Vaults”. Creation of such a Vault is a single click task and shouldn’t take too long.
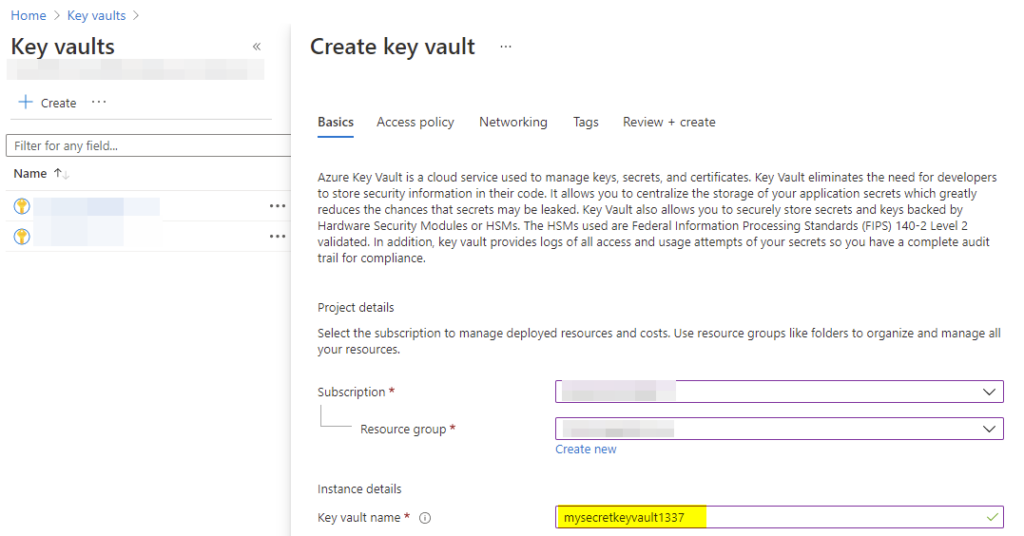
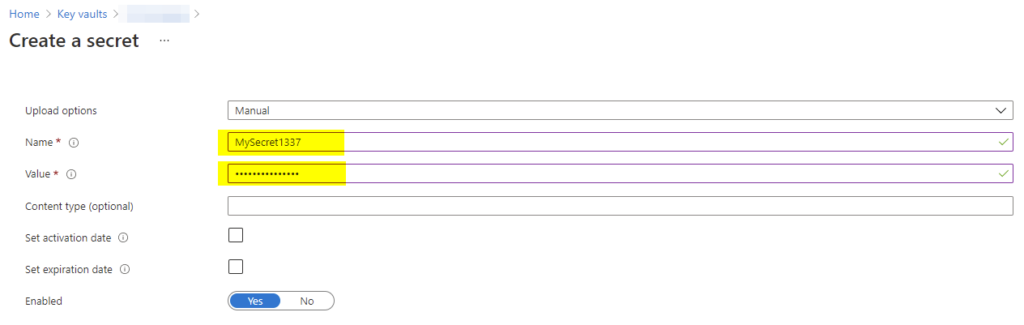
After successfully creating the vault, you should be able to insert your secrets.
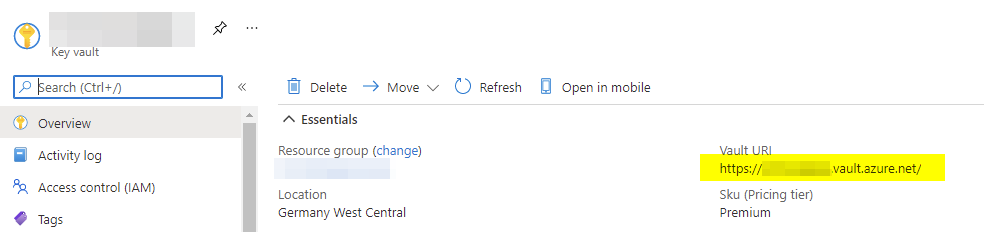
Note the “Vault URL” for later use in the app.json:
App Registration in Azure
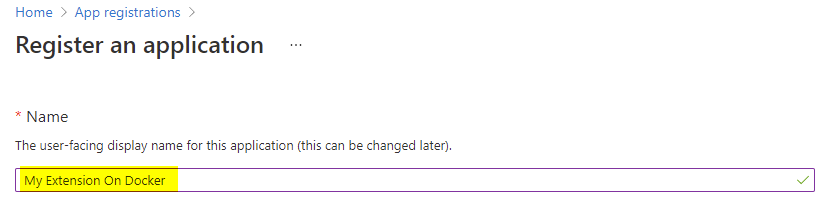
The next task is to create an App Registration. Through this app registration the BC service will be able to authenticate against Azure. So, we go to “App Registrations” and create a new one and assign a name that we like. At Comsol we name them more generic as multiple extensions may access the KeyVault through a single App.
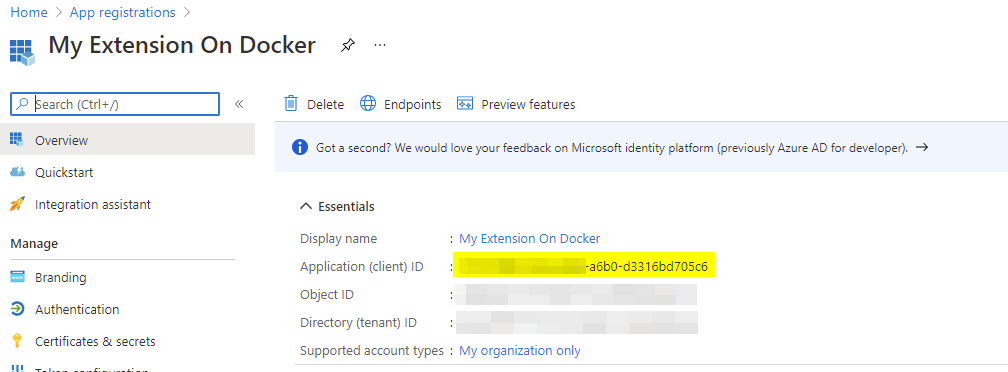
Registering the App
At this point we note the “Application client ID” for later usage:
Importing a certificate
Since authentication via the client ID is not sufficient, we must now additionally upload a certificate (for which we have the private key). Navigate to “Certificates & secrets” and upload e.g. the *.cer or *.crt of your certificate. You could use a use a trusted certificate from a certificate authority or even a self-signed certificate. (see MSDN)
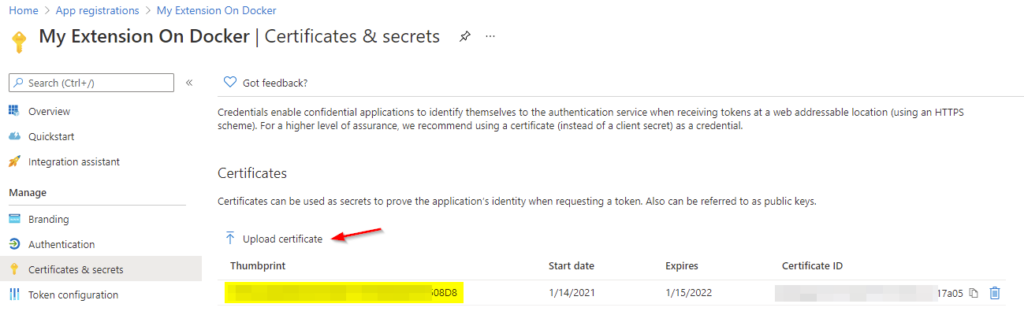
As the certificate is finally imported, we note the “Thumbprint” for later use. If you need some further advice on extracting your certificate’s .cer or .crt from a .pfx file, this post might help you.
Add Permission to your App
In the next step we allow our newly created App to access our Azure KeyVault. Navigate to your KeyVault and add a new access policy. Select the App under “Select principal” and give it the “Get” permission for secrets.
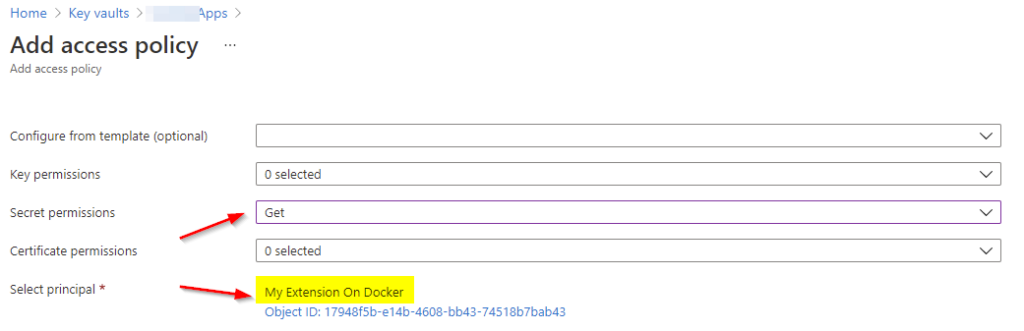
Now every service or extension authenticating with the given certificate and client ID will be able to access the secrets.
Setup your Service or Docker Container
Now it’s time to tell your Container or OnPrem Service how to authorize against the Azure KeyVault.
Classic installation
This is quite straight forward:
- Import the *.pfx of your certificate to the local machines certificate store
- Setup “Azure Key Vault Client Identity” of your BC service’s instance:
- “Client ID” is the application (client) ID from our app registration in Azure
- “Client Certificate Thumbprint” ist the thumbprint of our certificate

- Restart your BC Service
Docker installation
On docker containers it’s even easier as FreddyK has written a single-lined comandlet for this:
$ContainerName = 'MyContainer'
$Certificate = 'C:\Temp\MyCertificate.pfx'
$CertificatePassword = 'MyPassword1234'
$KeyVaultClientID = '00000000-0000-0000-0000-000000000000'

Set-BcContainerKeyVaultAadAppAndCertificate  `
    -containerName $ContainerName `
    -pfxFile $Certificate `
    -pfxPassword (ConvertTo-SecureString -String $CertificatePassword -AsPlainText -Force) `
    -clientId $KeyVaultClientID
- $Certificate is the path to your certificates *pfx file
- $CertificatePassword is your *pfx files password
- $KeyVaultClientID is the application (client) ID from our app registration in Azure
The comandlet will then copy the *.pfx to your container, import it and setup the BC instance as mentioned above.
How to use it
After all this configuration it’s finally time to access your secrets via AL. First, setup your app.json to let the app know where to find your KeyVault. You find the URL in your KeyVaults overview in the Azure Portal.
{
  ...,
  "keyVaultUrls": [
    "https://mysecretkeyvault1337.vault.azure.net/"
  ]
}
As the app.json references to the KeyVault, we could instantly fetch the values using the “App Key Vault Secret Provider” codeunit from the BC standard:
[NonDebuggable]
local procedure GetSecret(): Text
var
    SecretProvider: Codeunit "App Key Vault Secret Provider";
    MySecret: Text;
begin
    //Connect to the Azure Key Vault
    if SecretProvider.TryInitializeFromCurrentApp() then begin
        //Now fetch the actual secret by its name
        SecretProvider.GetSecret('MySecret1337', MySecret);
        exit(MySecret);
    end else
        Error('Error: ' + GetLastErrorText());
end;
Actually, that’s it. This is how to use Azure KeyVaults in BC OnPrem.
Jens Fritzsche
... is a technical consultant and developer at Comsol Unternehmenslösungen AG in Kronberg/Taunus. Major tasks are the architecture and implementation of complex, usually cross-system applications in and around Microsoft Dynamics 365 Business Central.