
REST API using S2S authentication
With deprecation of the good old basic authentication in Business Central SaaS versions we had to deal with the more complex OAuth authentication flows when we wanted to connect external services to our Business Central REST API. Luckily, Microsoft has provided us with a great and similarly simple option as Basic Auth, the Service to Service authentication. This standard OAuth flow is the perfect way to connect e.g. a webshop or similar to your ERP via REST API and webhooks.
In this short step-by-step tutorial we setup Business Central REST API using S2S authentication.
Create Azure App Registration
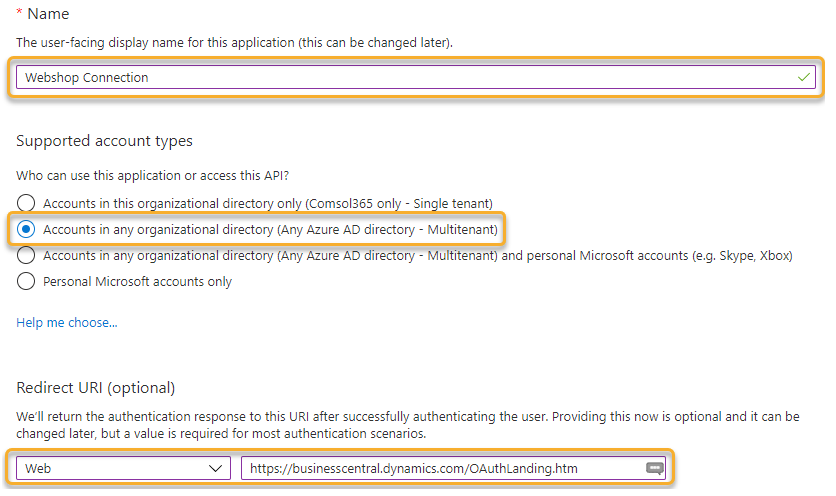
The first step is to create an App Registration in the Azure Portal. This is actually a representation of the external service within Azure. So basically our “service user”. That’s why I give it the appropriate name. In the option field Supported account types we choose Accounts in any organizational directory.
Last but not least, we now have to store a Redirect URL, i.e. the location to which the authorization server redirects the token after it was generated. This URL is always the same for this flow:
https://businesscentral.dynamics.com/OAuthLanding.htm
After pushing the Register button your app registration is created.
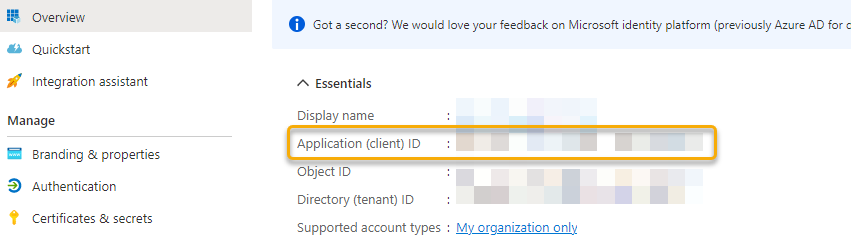
In the app registration’s overview page, remember the “Application (client) id” as we will need it later:
Client Secret
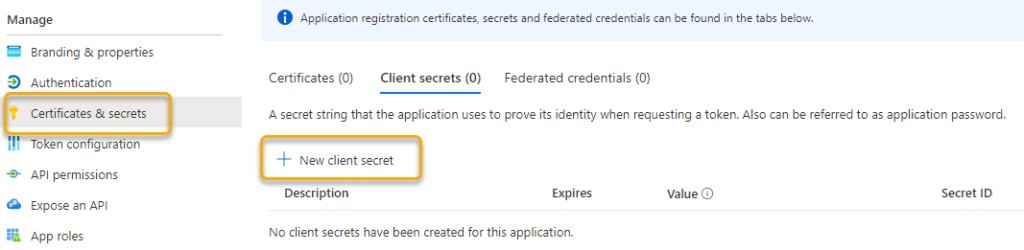
Now that we have successfully created our app registration, we need to create a new “Client Secret”:
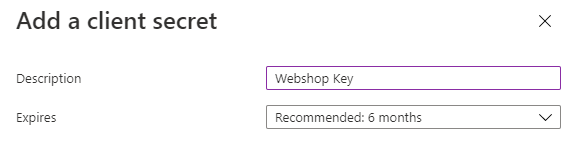
Don’t forget to copy the secret once you have confirmed this dialog. The “Client Id” and “Client Secret” will later be some kind of our username and password.
API permissions
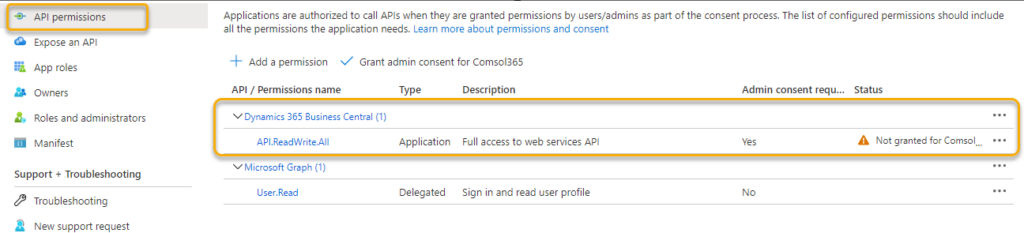
Of course, we also need to assign the appropriate permissions to the app registration. You can do this via the menu item API permissions. After clicking on Add a permission you will find the menu item Dynamics 365 Business Central in the Microsoft APIs. Here you select Application permissions and API.ReadWrite.All. That’s it.
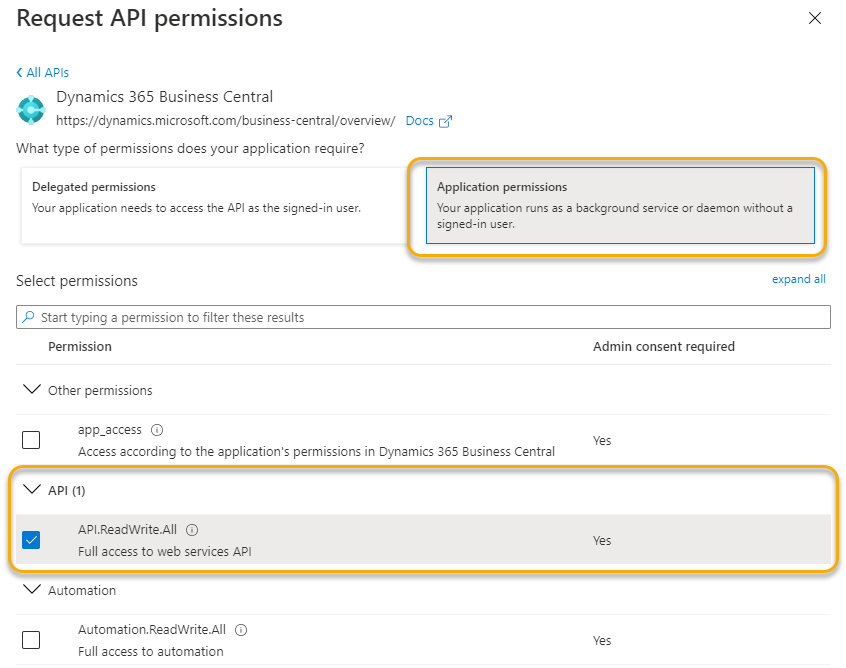
It is important to know that this permission does not grant full access to Business Central. It is rather to be understood as basic access. All effective permissions to the database are subsequently given within Business Central via the Azure Active Directory Applications page as follows.
Register App Registration in Business Central
In this step, we switch to our Business Central instance and navigate to the Microsoft Entra Applications Azure Active Directory Applications setup page to create the app. To do this, we only need the “Client ID” that we remembered earlier when we created our App Registration in the Azure Portal. All we have to do after that is to assign the necessary permissions to the app:
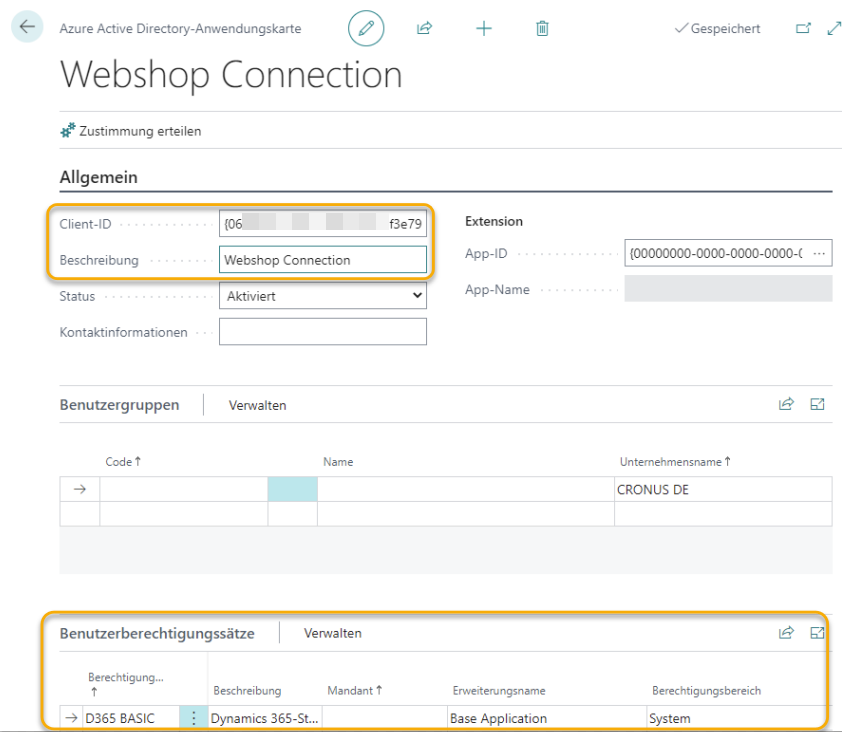
Last but not least hit the “Grant Consent” button to allow the Connection. Alternatively you could already finish this in the App Registration in the API permissions page of your Azure App Registration:

Testing the API connection
To test our freshly baked webshop connection, I use the well-known Visual Studio Code extension REST Client. With a few lines we can get an authentication token and fire the first query against the Business Central API, in this case to get the companies in the database.
Get a fresh Token
@tenantId = xxxx81f8-xxxx-xxxx-xxxx-c6693e3aaxxx
@clientId = xxxx155b-xxxx-xxxx-xxxx-3e9c40775xxx
@clientSecret = xxx7Q~Ga.Ya6s1_udxyfvogYIxxXXvTk-Qv~F

# @name login
POST https://login.microsoftonline.com/{{tenantId}}/oauth2/v2.0/token
Content-Type: application/x-www-form-urlencoded

grant_type=client_credentials
&client_id={{clientId}}
&client_secret={{clientSecret}}
&scope=https://api.businesscentral.dynamics.com/.default
In the response we will find our token as well as its expiry date. For this authentication flow we could perfectly use our pattern from my older blog post OAuth 2.0 / JWT in AL.
{
  "token_type": "Bearer",
  "expires_in": 3599,
  "ext_expires_in": 3599,
  "access_token": "xxxxxxxx"
}
Query Companies
After we have saved the token, we can now send arbitrary queries to the REST API. Of course, only those for which we have permissions in Business Central. In our case, we simply retrieve the list of companies.
@authToken = {{login.response.body.access_token}}
@instance = Sandbox

#### @name getCompanies
GET  https://api.businesscentral.dynamics.com/v2.0/{{tenantId}}/{{instance}}/api/v2.0/companies
Authorization: Bearer {{authToken}}Jens Fritzsche
... is a technical consultant and developer at Comsol Unternehmenslösungen AG in Kronberg/Taunus. Major tasks are the architecture and implementation of complex, usually cross-system applications in and around Microsoft Dynamics 365 Business Central.